• A Complete Guide on Car Paint Repair


    Your car’s paint job is one of the first things people notice. It’s not just about aesthetics; a good paint job also protects your vehicle from rust, corrosion, and damage caused by the environment. Over time, exposure to sun, road debris, and accidents can lead to scratches, chips, and dullness in the paint. Repairing or refreshing your car’s paint can make it look brand new and extend its lifespan. Here’s a comprehensive guide to car paint repair, covering everything from identifying damage to DIY and professional options.

    1. Understanding Different Types of Paint Damage


    Before you begin any repairs, it’s crucial to identify the type of damage. Car paint damage can range from minor imperfections to serious issues that expose the car’s metal surface. The most common types include:

    • Scratches: These can occur from keys, tree branches, or accidental contact with other objects. They vary in depth, with some only affecting the clear coat while others penetrate through the color and primer layers.
    • Stone Chips: These are tiny chips in the paint caused by debris or gravel hitting the surface at high speeds. They often appear on the front bumper, hood, or sides of the car.
    • Oxidation: Over time, exposure to UV rays can cause the paint to fade and become chalky. This is called oxidation, which primarily affects the car’s clear coat.
    • Peeling: In cases where the clear coat begins to separate from the paint, you’ll notice peeling or bubbling areas. This typically happens due to improper application or prolonged exposure to harsh weather conditions.

    Once you understand the type of damage, you can decide how to approach the repair.

    2. DIY Car Paint Repair: When and How to Do It


    For minor scratches, chips, and small areas of fading, a DIY approach can be effective and cost-efficient. Here’s a step-by-step guide to fixing common paint issues on your own:

    a. Fixing Scratches


    • Assess the depth: If the scratch only affects the clear coat (the top layer), it can usually be buffed out. For deeper scratches that reach the paint or primer, you’ll need touch-up paint.
    • Buff out light scratches: Use a rubbing compound or scratch remover to buff out surface scratches. Apply the product using a microfiber cloth, rubbing gently in circular motions until the scratch fades.
    • Touch-up deeper scratches: For deeper scratches, clean the area with soap and water, then apply touch-up paint that matches your car’s color. Most manufacturers offer small bottles or pens of matching paint.

    b. Repairing Stone Chips

    • Clean the area: Remove any dirt or debris from the chip. You can use rubbing alcohol to clean the surface thoroughly.
    • Apply touch-up paint: Use a fine-tipped brush or paint pen to carefully apply touch-up paint. Make sure the paint is a perfect match to your car’s original color.
    • Finish with clear coat: Once the paint dries, apply a thin layer of clear coat to seal the repair and restore shine.

    c. Dealing with Oxidation


    • Wash the car thoroughly: Use car soap and water to remove dirt and grime.
    • Polish the surface: After drying the car, use a car polish to restore some shine to the oxidized areas. This process may need to be repeated several times for best results.
    • Wax for protection: Finish by applying a coat of wax to protect the paint from future oxidation and UV damage.

    d. Peeling Paint

    For peeling paint, it’s best to visit a professional since the entire panel might need to be sanded and repainted.

    3. When to Seek Professional Help


    While DIY methods can work well for small issues, larger paint damage should be handled by professionals. If your car has large scratches, extensive oxidation, or peeling, a professional body shop will have the tools and expertise to restore your car’s finish.

    Reasons to choose professional repair:

    • Color Matching: Professionals use advanced tools to ensure an exact color match with the original paint, which can be challenging for DIY repairs.
    • Quality of Finish: A professional job will result in a smoother, more durable finish that lasts longer.
    • Dealing with Severe Damage: If the damage has penetrated to the metal, the repair requires specialized equipment to sand, prime, and repaint the surface.

    4. Prevention Tips for Maintaining Your Car’s Paint


    Maintaining your car’s paint isn’t just about repairs — it’s also about prevention. Here are some tips to keep your car’s paint looking new for as long as possible:

    • Regular Washing: Dirt, dust, and road salt can eat away at the paint over time. Wash your car regularly to prevent buildup.
    • Apply Wax: Wax adds an extra layer of protection against UV rays, moisture, and debris. Apply it every few months for best results.
    • Park in Shade: Prolonged exposure to the sun’s UV rays can fade the paint. Whenever possible, park in the shade or use a car cover.
    • Use Paint Protection Films: These clear films protect the paint from minor scratches, chips, and fading, especially on high-impact areas like the front bumper and hood.

    How Service My Car Assist You?

    Looking for top-notch mclaren service in dubai? Whether it’s routine maintenance or complex repairs, your McLaren deserves the best care to maintain its high performance. At Service My Car, we offer specialized services for McLaren vehicles, ensuring every detail is attended to with precision. From engine checks to brake repairs, our skilled technicians use the latest tools and techniques to keep your McLaren in peak condition. Trust us with your luxury sports car and experience exceptional service. Book your appointment today!

    Conclusion

    Car paint repair doesn’t have to be intimidating. Whether you’re tackling minor chips or dealing with more serious damage, understanding the process can save you time, money, and frustration. For minor repairs, DIY methods can be effective, but for larger damage, seeking professional help ensures a high-quality finish. By keeping up with regular maintenance and taking preventative measures, you can keep your car looking fresh and vibrant for years to come.

  • 7 Common Causes of Flat Tires and How to Prevent Them


    Flat tires are an inconvenience that most drivers will face at some point. Whether it’s during a quick commute or a long road trip, a flat tire can derail your plans and create frustration. However, understanding the common causes of flat tires can help you take preventative measures to avoid them. In this article, we will explore seven frequent reasons for flat tires and what you can do to keep your tires in optimal condition.

    1. Punctures by Sharp Objects

    One of the most common causes of a flat tire is a puncture by sharp objects, such as nails, screws, or glass. These hazards can easily pierce through your tire’s rubber, leading to a slow leak or immediate deflation.

    Prevention: Regularly inspect your tires for embedded objects and be mindful of where you drive, especially through construction sites or debris-strewn roads. If you spot a nail or similar object lodged in the tire, don’t pull it out immediately; this could worsen the leak. Instead, get the tire checked by a professional.

    2. Underinflation


    Driving with underinflated tires can lead to uneven wear, which weakens the tire’s structure and increases the risk of a blowout. Tires with low air pressure generate excessive heat, particularly during long drives, which can damage the sidewalls and cause a rupture.

    Prevention: Use a tire pressure gauge to check the pressure at least once a month or before long trips. Follow your vehicle manufacturer’s recommendations for optimal tire pressure, which can usually be found on a sticker in the driver’s side door frame or in the owner’s manual.

    3. Overloading the Vehicle


    Carrying more weight than your vehicle’s recommended load capacity can put undue stress on your tires. Overloaded tires are more susceptible to blowouts and excessive wear, as they carry the extra load unevenly.

    Prevention: Make sure your vehicle’s load capacity, which is typically listed on the same label as tire pressure recommendations, is not exceeded. When moving heavy items, distribute the weight evenly to reduce strain on individual tires.

    4. Hitting Potholes or Curbs


    Potholes, curbs, and other road hazards can cause immediate tire damage, especially if hit at high speeds. The impact can lead to a pinch flat, where the tire is compressed between the object and the wheel rim, causing a tear or puncture.

    Prevention: Be cautious of road conditions and avoid potholes and curbs whenever possible. If you can’t avoid them, try to slow down to minimize the impact. Regularly inspect your tires and rims for any visible damage after hitting an obstacle.

    5. Worn Tire Tread


    As tires wear down, they become more susceptible to punctures and flats. Bald tires lack sufficient tread to grip the road properly and are more prone to blowouts due to their weakened structure. In wet conditions, they are also more likely to cause hydroplaning.

    Prevention: Check the tread depth of your tires using the penny test: insert a penny into the tire’s tread with Lincoln’s head facing downward. If you can see the top of Lincoln’s head, it’s time to replace your tires. Rotating your tires regularly can also help ensure even wear, extending their lifespan.

    6. Valve Stem Leaks

    The valve stem, which allows you to inflate the tire, can develop leaks over time due to damage or wear. A faulty valve stem can cause a slow loss of air, leading to a flat tire if not addressed. Dirt, debris, and exposure to the elements can also contribute to valve stem deterioration.

    Prevention: During regular tire maintenance, ask your mechanic to inspect the valve stems for wear or damage. If you notice air leaking around the valve, have it replaced as soon as possible. A quick visual inspection when inflating your tires can also help detect early signs of leaks.

    7. Extreme Temperatures


    Fluctuating temperatures can cause your tire pressure to increase or decrease rapidly. In hot weather, the air inside the tire expands, potentially leading to overinflation and a blowout. Conversely, cold weather can cause underinflation, which increases the risk of a flat tire.

    Prevention: Check your tire pressure more frequently during temperature extremes, especially in the summer and winter months. Tire pressure tends to drop about 1–2 PSI for every 10°F decrease in temperature, so it’s essential to adjust accordingly.

    How Service My Car Assist You?

    Looking to give your car the royal treatment it deserves? Service My Car offers a top-notch car cleaning service that will leave your vehicle looking as good as new. From a thorough exterior wash to a meticulous interior detailing, our team of experts pays attention to every detail. Say goodbye to dirt, dust, and grime, and hello to a fresh, clean car! Trust Service My Car to provide the best care for your vehicle, inside and out.

    Conclusion

    Flat tires are an unfortunate but inevitable part of driving. However, by understanding the common causes of flat tires, you can take steps to reduce your risk. Regular tire maintenance, proper inflation, and cautious driving are crucial to extending the life of your tires and avoiding the hassle of a flat. Remember, prevention is key — don’t wait until you’re stranded on the side of the road to think about tire care!

  • Essential Roadside Assistance: Your Ultimate Guide to Staying Safe on the Road


    Whether you’re a seasoned driver or someone new to the road, the unexpected can happen at any time. A flat tire, dead battery, or engine trouble can quickly turn a pleasant drive into a stressful situation. This is where roadside assistance comes in — a safety net that every driver should consider essential. In this guide, we’ll explore the importance of roadside assistance, what it typically covers, and how you can stay safe when you’re stranded on the road.

    Why Roadside Assistance is Essential


    Roadside assistance provides peace of mind when you’re on the road. It’s not just about getting help when you need it — it’s about knowing that help is available 24/7, no matter where you are. Whether you’re on a long road trip or just commuting to work, roadside assistance ensures that you’re never truly alone.

    Imagine you’re driving through a remote area, far from the nearest town, and suddenly your car breaks down. Without roadside assistance, you might be left to figure out how to tow your car or find the nearest mechanic. But with a roadside assistance plan, one call can connect you to a professional who will come to your aid, whether you need a tow, fuel delivery, or even a locksmith.

    What Does Roadside Assistance Typically Cover?


    While the specifics can vary depending on your provider and plan, most roadside assistance packages cover a range of common
    emergencies:

    1. Towing Services: If your car breaks down and can’t be fixed on the spot, a tow truck will be dispatched to take your vehicle to the nearest repair shop. This can save you from the hefty fees that towing companies often charge, especially if you’re far from a populated area.

    2. Battery Jump-Starts: A dead battery is one of the most common reasons for roadside assistance calls. Whether it’s due to cold weather, leaving your lights on, or just an old battery, a quick jump-start can get you back on the road.

    3. Flat Tire Changes: Not everyone knows how to change a tire, and even if you do, it can be dangerous on a busy highway. Roadside assistance will send someone to safely change your tire for you.


    4. Lockout Services: It’s easy to accidentally lock your keys in your car. Roadside assistance can help you regain access without damaging your vehicle.

    5. Fuel Delivery: Running out of gas happens to the best of us. If you find yourself stranded with an empty tank, roadside assistance will deliver enough fuel to get you to the nearest gas station.

    6. Minor Mechanical Repairs: In some cases, a technician might be able to perform a quick fix on-site, saving you the time and hassle of towing your car to a repair shop.

    Staying Safe While Waiting for Assistance


    Even with the security of roadside assistance, it’s important to prioritize your safety while waiting for help to arrive. Here are some tips to keep in mind:

    1. Pull Over Safely: If your car is still operable, try to pull over to a safe location, such as a rest area or the shoulder of the road. Make sure your vehicle is as far off the road as possible to avoid being hit by passing traffic.

    2. Turn on Your Hazard Lights: This alerts other drivers to your presence and helps ensure that you and your vehicle are visible, especially in low-light conditions.


    3. Stay Inside Your Vehicle: Unless it’s safer to be outside (e.g., your car is smoking or there’s a risk of fire), it’s usually best to stay inside your vehicle with your seatbelt on. If you need to exit, do so from the passenger side, away from traffic.

    4. Use Reflective Markers: If you have them, set out reflective triangles or flares behind your vehicle to further increase your visibility to other drivers.

    5. Keep Your Phone Charged: A fully charged phone is your lifeline in an emergency. Keep a car charger handy, and consider carrying a portable power bank as a backup.

    Choosing the Right Roadside Assistance Plan


    When selecting a roadside assistance plan, consider your driving habits, the age of your vehicle, and how much you travel. Some plans are bundled with auto insurance policies, while others are offered by car manufacturers, credit card companies, or third-party providers.

    Look for a plan that offers nationwide coverage, 24/7 service, and a good reputation for quick response times. It’s also wise to compare what different plans cover and any limitations they might have, such as the number of service calls allowed per year or the maximum towing distance.

    How Service My Car Assist You?

    Wondering where to find top-notch car detailing dubai? Look no further! Service My Car has you covered with premium car detailing in Dubai, ensuring your vehicle shines inside and out. Our meticulous attention to detail guarantees a showroom-worthy finish, leaving your car looking pristine and refreshed. Trust Service My Car for unparalleled expertise and professionalism in car detailing, ensuring your ride stands out on the streets of Dubai.

    Conclusion

    Roadside assistance is more than just an add-on to your insurance policy — it’s a crucial part of staying safe on the road. By understanding what your roadside assistance plan covers and how to stay safe while waiting for help, you can drive with confidence, knowing that you’re prepared for whatever the road throws your way.

  • Step-by-Step Guide to Brake Pads Replacement


    Brake pads are one of the most critical components in your vehicle’s braking system. Over time, they wear down and need to be replaced to ensure your car stops safely. While this might seem like a job for a professional mechanic, it’s actually something you can do yourself with the right tools and knowledge. This step-by-step guide will walk you through the process of replacing your brake pads, saving you money and giving you a better understanding of your vehicle’s maintenance needs.

    Tools and Materials You’ll Need:

    Before you begin, gather the following tools and materials:

    • New brake pads (specific to your vehicle’s make and model)
    • Jack and jack stands
    • Lug wrench
    • C-clamp or brake caliper tool
    • Socket and ratchet set
    • Torque wrench
    • Brake cleaner
    • Gloves and safety glasses
    • Wheel chocks

    Having the right tools on hand is essential for a smooth process. Double-check that the brake pads you’ve purchased match your vehicle to avoid any issues during installation.

    Step 1: Prepare Your Vehicle


    Start by ensuring your car is in a safe position. Park on a flat, level surface and engage the parking brake to prevent the vehicle from rolling. Place wheel chocks behind the rear wheels for added security.

    Next, use a lug wrench to slightly loosen the lug nuts on the wheels where you’ll be replacing the brake pads. Don’t remove them entirely just yet — loosening them now will make it easier to remove the wheel once the car is lifted.

    With the lug nuts loosened, it’s time to lift your vehicle. Position the jack under the car’s designated jack points (refer to your owner’s manual if you’re unsure where these are) and raise the car until the wheel is off the ground. Once lifted, place jack stands under the car to securely support it. Lower the car onto the jack stands, ensuring it’s stable before moving forward.

    Safety Tip:

    Never rely solely on a jack to support your vehicle while working underneath it. Always use jack stands for added safety.

    Step 2: Remove the Wheel


    With the car securely lifted, finish removing the loosened lug nuts and take off the wheel. Set the wheel aside in a safe place, as you’ll need to reinstall it later. Removing the wheel exposes the brake caliper and rotor, giving you access to the brake pads.

    Step 3: Remove the Brake Caliper


    The brake caliper is the component that houses the brake pads. To access the pads, you’ll need to remove the caliper. Locate the caliper bolts on the back of the caliper. Using a socket and ratchet, carefully remove these bolts.

    Once the bolts are removed, gently slide the caliper off the rotor. Be careful not to let the caliper hang by the brake line, as this can cause damage. Instead, use a bungee cord to hang the caliper from the suspension, or rest it on a nearby surface.

    Pro Tip:

    Before removing the old brake pads, take a moment to observe their positioning. This will help when it’s time to install the new pads.

    Step 4: Remove Old Brake Pads


    With the caliper removed, you can now slide the old brake pads out of the caliper bracket. Take a moment to inspect them for wear. If the
    pads are worn unevenly, this could indicate issues with your brake system that may need attention beyond just replacing the pads.

    Step 5: Compress the Caliper Piston


    Before you can install the new brake pads, you’ll need to compress the caliper piston. This is necessary because the new pads are thicker than the worn-out ones, and the piston needs to be retracted to make space.

    Use a C-clamp or a brake caliper tool to slowly compress the piston back into the caliper. Be sure to go slowly and carefully to avoid damaging the caliper. This step is crucial for ensuring that the new pads will fit correctly and function properly.

    After compressing the piston, it’s a good idea to spray the caliper with brake cleaner to remove any dirt or debris.

    Step 6: Install New Brake Pads


    Now it’s time to install the new brake pads. Slide them into the caliper bracket, making sure they’re properly aligned and seated. Once the new pads are in place, reposition the brake caliper over the rotor and pads.

    Reinstall the caliper bolts, tightening them securely. If you have a torque wrench, use it to tighten the bolts to the manufacturer’s recommended torque specifications. This ensures that the caliper is properly secured.

    Step 7: Reinstall the Wheel


    With the new brake pads in place and the caliper securely reinstalled, it’s time to put the wheel back on. Align the wheel with the hub and hand-tighten the lug nuts to hold it in place.

    Use the jack to lift the vehicle slightly, just enough to remove the jack stands. Carefully lower the car back to the ground. Once the car is fully lowered, use a torque wrench to fully tighten the lug nuts in a crisscross pattern. This ensures even pressure and proper wheel alignment.

    Step 8: Test the Brakes


    Before hitting the road, it’s crucial to test the brakes. Start by pumping the brake pedal a few times while the car is still stationary. This helps seat the new pads against the rotor.

    Next, take your car for a short test drive in a safe area. Listen for any unusual noises and ensure that the brakes feel firm and responsive. If everything checks out, you’ve successfully replaced your brake pads!

    How Service My Car Assist You?

    Struggling with a malfunctioning AC in your Mercedes-Benz E300? Let Service My Car handle it with precision. Our skilled technicians are experts in mercedes-benz e300 ac repair, delivering quick and reliable solutions to restore your vehicle's cooling system. Experience comfort and efficiency with Service My Car, where we ensure your air conditioning operates flawlessly. Trust us for expert care and exceptional results for your Mercedes-Benz E300.

    Conclusion

    Replacing your brake pads is a task that, with a little patience and the right tools, you can accomplish yourself. Not only does it save you money, but it also gives you the satisfaction of maintaining your vehicle. Remember to always prioritize safety and follow the steps carefully.

  • The Importance of Regular Car Oil Changes: A Guide for Vehicle Maintenance


    Brake pads are one of the most critical components in your vehicle’s braking system. Over time, they wear down and need to be replaced to ensure your car stops safely. While this might seem like a job for a professional mechanic, it’s actually something you can do yourself with the right tools and knowledge. This step-by-step guide will walk you through the process of replacing your brake pads, saving you money and giving you a better understanding of your vehicle’s maintenance needs.

    Tools and Materials You’ll Need:

    Before you begin, gather the following tools and materials:

    • New brake pads (specific to your vehicle’s make and model)
    • Jack and jack stands
    • Lug wrench
    • C-clamp or brake caliper tool
    • Socket and ratchet set
    • Torque wrench
    • Brake cleaner
    • Gloves and safety glasses
    • Wheel chocks

    Having the right tools on hand is essential for a smooth process. Double-check that the brake pads you’ve purchased match your vehicle to avoid any issues during installation.

    Step 1: Prepare Your Vehicle


    Start by ensuring your car is in a safe position. Park on a flat, level surface and engage the parking brake to prevent the vehicle from rolling. Place wheel chocks behind the rear wheels for added security.

    Next, use a lug wrench to slightly loosen the lug nuts on the wheels where you’ll be replacing the brake pads. Don’t remove them entirely just yet — loosening them now will make it easier to remove the wheel once the car is lifted.

    With the lug nuts loosened, it’s time to lift your vehicle. Position the jack under the car’s designated jack points (refer to your owner’s manual if you’re unsure where these are) and raise the car until the wheel is off the ground. Once lifted, place jack stands under the car to securely support it. Lower the car onto the jack stands, ensuring it’s stable before moving forward.

    Safety Tip:

    Never rely solely on a jack to support your vehicle while working underneath it. Always use jack stands for added safety.

    Step 2: Remove the Wheel


    With the car securely lifted, finish removing the loosened lug nuts and take off the wheel. Set the wheel aside in a safe place, as you’ll need to reinstall it later. Removing the wheel exposes the brake caliper and rotor, giving you access to the brake pads.

    Step 3: Remove the Brake Caliper


    The brake caliper is the component that houses the brake pads. To access the pads, you’ll need to remove the caliper. Locate the caliper bolts on the back of the caliper. Using a socket and ratchet, carefully remove these bolts.

    Once the bolts are removed, gently slide the caliper off the rotor. Be careful not to let the caliper hang by the brake line, as this can cause damage. Instead, use a bungee cord to hang the caliper from the suspension, or rest it on a nearby surface.

    Pro Tip:

    Before removing the old brake pads, take a moment to observe their positioning. This will help when it’s time to install the new pads.

    Step 4: Remove Old Brake Pads


    With the caliper removed, you can now slide the old brake pads out of the caliper bracket. Take a moment to inspect them for wear. If the
    pads are worn unevenly, this could indicate issues with your brake system that may need attention beyond just replacing the pads.

    Step 5: Compress the Caliper Piston


    Before you can install the new brake pads, you’ll need to compress the caliper piston. This is necessary because the new pads are thicker than the worn-out ones, and the piston needs to be retracted to make space.

    Use a C-clamp or a brake caliper tool to slowly compress the piston back into the caliper. Be sure to go slowly and carefully to avoid damaging the caliper. This step is crucial for ensuring that the new pads will fit correctly and function properly.

    After compressing the piston, it’s a good idea to spray the caliper with brake cleaner to remove any dirt or debris.

    Step 6: Install New Brake Pads


    Now it’s time to install the new brake pads. Slide them into the caliper bracket, making sure they’re properly aligned and seated. Once the new pads are in place, reposition the brake caliper over the rotor and pads.

    Reinstall the caliper bolts, tightening them securely. If you have a torque wrench, use it to tighten the bolts to the manufacturer’s recommended torque specifications. This ensures that the caliper is properly secured.

    Step 7: Reinstall the Wheel


    With the new brake pads in place and the caliper securely reinstalled, it’s time to put the wheel back on. Align the wheel with the hub and hand-tighten the lug nuts to hold it in place.

    Use the jack to lift the vehicle slightly, just enough to remove the jack stands. Carefully lower the car back to the ground. Once the car is fully lowered, use a torque wrench to fully tighten the lug nuts in a crisscross pattern. This ensures even pressure and proper wheel alignment.

    Step 8: Test the Brakes


    Before hitting the road, it’s crucial to test the brakes. Start by pumping the brake pedal a few times while the car is still stationary. This helps seat the new pads against the rotor.

    Next, take your car for a short test drive in a safe area. Listen for any unusual noises and ensure that the brakes feel firm and responsive. If everything checks out, you’ve successfully replaced your brake pads!

    How Service My Car Assist You?

    Struggling with a malfunctioning AC in your Mercedes-Benz E300? Let Service My Car handle it with precision. Our skilled technicians are experts in mercedes-benz e300 ac repair, delivering quick and reliable solutions to restore your vehicle's cooling system. Experience comfort and efficiency with Service My Car, where we ensure your air conditioning operates flawlessly. Trust us for expert care and exceptional results for your Mercedes-Benz E300.

    Conclusion

    Replacing your brake pads is a task that, with a little patience and the right tools, you can accomplish yourself. Not only does it save you money, but it also gives you the satisfaction of maintaining your vehicle. Remember to always prioritize safety and follow the steps carefully.

  • The Ultimate Guide to Car Wheel Alignment: Why It Matters and How to Get It Right


    Car wheel alignment is a critical aspect of vehicle maintenance that often goes unnoticed until it causes significant problems. Proper wheel alignment ensures your vehicle drives smoothly, efficiently, and safely. This comprehensive guide will explore why wheel alignment matters, the signs that indicate your car needs alignment, and how to get it right.

    What is Wheel Alignment?


    Wheel alignment refers to the adjustment of the angles of the wheels so that they are set to the manufacturer’s specifications. The primary angles involved in wheel alignment are:

    1. Camber: The angle of the wheels when viewed from the front of the car. If the top of the wheel leans inward (negative camber) or outward (positive camber), it can affect tire wear and handling.

    2. Toe: The angle at which the tires turn inward or outward when viewed from above. Toe-in means the front of the tires are closer together, while toe-out means they are further apart.

    3. Caster: The angle of the steering axis when viewed from the side of the vehicle. It affects the steering stability and cornering performance.

    Why Wheel Alignment Matters


    1. Safety: Misaligned wheels can lead to uneven tire wear, reducing the tire’s effectiveness and increasing the risk of blowouts or accidents. Proper alignment ensures better control and stability of the vehicle.

    2. Fuel Efficiency: When your wheels are aligned correctly, your tires have less rolling resistance. This means your engine doesn’t have to work as hard, leading to better fuel economy.


    3. Tire Longevity: Proper alignment prevents uneven tire wear, extending the life of your tires and saving you money in the long run.

    4. Smooth Ride: Misalignment can cause your car to pull to one side, vibrate, or produce a bumpy ride. Aligning the wheels ensures a smoother and more comfortable driving experience.

    Signs Your Car Needs a Wheel Alignment


    1. Uneven Tire Wear: If you notice that the tread on your tires is wearing unevenly, it’s a clear sign that your wheels are misaligned.

    2. Vehicle Pulls to One Side: When driving on a straight, level road, your car should drive straight. If it pulls to one side, it’s time to check the alignment.

    3. Steering Wheel Off-Center: Your steering wheel should be centered when driving straight. If it’s off-center, even by a small amount, it indicates a potential alignment issue.


    4. Steering Wheel Vibration: If your steering wheel vibrates or shakes, especially at higher speeds, it could be due to misaligned wheels.

    5. Squealing Tires: Misaligned wheels can cause your tires to squeal, particularly during turns.

    How to Get Your Wheel Alignment Right


    1. Professional Alignment Services: The most reliable way to ensure proper alignment is to take your car to a professional service center. They have the necessary equipment and expertise to align your wheels according to the manufacturer’s specifications.

    2. Regular Maintenance Checks: Include alignment checks in your regular vehicle maintenance routine. It’s recommended to check the alignment every 6,000 miles or as specified in your car’s owner manual.

    3. DIY Alignment Checks: While it’s challenging to achieve perfect alignment at home without professional equipment, you can do preliminary checks. Measure the distance between the front and back of the front tires to check the toe alignment. If there’s a significant difference, you likely have an alignment issue.


    4. Avoid Potholes and Rough Roads: While it’s not always possible, try to avoid potholes and rough roads that can knock your wheels out of alignment.

    5. Monitor Tire Pressure: Keeping your tires properly inflated can also help maintain alignment. Under-inflated or over-inflated tires can affect the alignment angles.

    How Service My Car Assists You?

    Wondering where to get top-notch doorstep car repair? Look no further! Service My Car offers hassle-free doorstep car repair services, ensuring your vehicle gets the attention it needs without you having to step out. With skilled technicians arriving equipped to handle various automotive issues, you can say goodbye to the hassle of traditional repair shops. Experience the ease of scheduling repairs at your convenience and enjoy the peace of mind knowing your vehicle is in expert hands, all from the comfort of your home.

    Conclusion

    Proper wheel alignment is crucial for the safety, performance, and longevity of your vehicle. By understanding the importance of alignment and recognizing the signs of misalignment, you can take proactive steps to ensure your car remains in optimal condition. Regular maintenance and professional alignment services are key to achieving a smooth, efficient, and safe driving experience.

  • Toyota Camry Common Problems: A Comprehensive Guide to Troubleshooting


    If you own a Toyota Camry or are considering buying one, it’s essential to be aware of common issues that may arise. While the Camry is known for its reliability, like any vehicle, it can experience problems over time. In this guide, we’ll explore some of the most frequently reported issues with the Toyota Camry and provide tips on how to address them.

    1. Toyota Camry Engine Oil Consumption


    One of the most common problems reported by Toyota Camry owners is excessive engine oil consumption. Some models, particularly those with the 2.5-liter four-cylinder engine, may experience oil consumption between scheduled oil changes. This can lead to engine damage if not addressed promptly.

    Solution: If you notice your Camry consuming more oil than usual, it’s crucial to have it inspected by a qualified mechanic. They can determine the cause of the excessive consumption and recommend appropriate repairs, which may include replacing piston rings or valve seals.

    2. Toyota Camry Transmission Issues


    Another frequent complaint among Camry owners involves transmission problems. These can manifest as rough shifting, slipping gears, or transmission fluid leaks. Ignoring transmission issues can result in costly repairs down the line.

    Solution: Regular maintenance, including fluid checks and changes, can help prevent transmission problems. If you experience any unusual symptoms, such as jerking or hesitation during gear shifts, have your Camry inspected by a professional technician.

    3. Toyota Camry Brake Noise


    Brake squeaking or grinding is a common issue reported by Toyota Camry drivers. This noise can indicate worn brake pads, rotor damage, or other brake system problems. Ignoring brake issues can compromise your vehicle’s safety.

    Solution: Have your brakes inspected regularly and replace worn brake components as needed. Proper maintenance, including cleaning and lubricating brake components, can help prevent noise and ensure optimal braking performance.

    4. Toyota Camry Suspension Problems


    Some Toyota Camry models may experience suspension issues, such as excessive bouncing, uneven tire wear, or steering instability. These problems can affect ride comfort and handling.

    Solution: A thorough inspection of the suspension system by a qualified mechanic can identify any worn or damaged components. Replacing worn shocks, struts, or control arms can restore your Camry’s ride quality and stability.

    5. Toyota Camry Electrical Malfunctions


    Electrical problems, such as malfunctioning power windows, faulty door locks, or dashboard warning lights, can occur in Toyota Camry vehicles. These issues may stem from wiring faults, sensor failures, or faulty components.

    Solution: Diagnosing electrical issues requires specialized equipment and expertise. A certified technician can perform diagnostic tests to pinpoint the source of the problem and recommend appropriate repairs.

    6. Toyota Camry Air Conditioning Problems


    Many Camry owners have reported issues with their air conditioning systems, such as weak airflow, inconsistent cooling, or unusual odors. These problems can arise from refrigerant leaks, compressor issues, or air duct blockages.

    Solution: Regular maintenance, including air filter replacement and refrigerant checks, can help prevent air conditioning problems. If you experience any issues with your Camry’s AC system, have it inspected by a professional technician.

    7. Toyota Camry Fuel System Issues


    Fuel-related problems, such as engine hesitation, stalling, or poor fuel economy, can occur in Toyota Camry vehicles. These issues may be caused by dirty fuel injectors, fuel pump failures, or clogged fuel filters.

    Solution: Routine fuel system maintenance, including fuel injector cleaning and fuel filter replacement, can help prevent performance issues. If you notice any symptoms of fuel system problems, have your Camry inspected by a qualified mechanic.

    8. Toyota Camry Exterior Paint Peeling


    Some Toyota Camry owners have reported issues with exterior paint peeling or fading prematurely. This can detract from the vehicle’s appearance and potentially lead to corrosion if left untreated.

    Solution: Addressing paint problems promptly can help prevent further damage. Depending on the extent of the damage, repainting affected areas or applying protective coatings may be necessary to restore the Camry’s appearance.

    9. Toyota Camry Dashboard Cracks


    Cracks or splits in the dashboard are a common cosmetic issue reported by Toyota Camry owners, particularly in older models. These cracks can be unsightly and may worsen over time.

    Solution: While dashboard cracks typically do not affect vehicle performance, they can detract from the interior aesthetics. Replacing the dashboard or using cosmetic repair kits can help restore the interior appearance of your Camry.

    10. Toyota Camry Excessive Wind Noise


    Some Camry owners have complained about excessive wind noise, particularly at higher speeds. This can be caused by poorly sealed windows, worn weather stripping, or aerodynamic design flaws.

    Solution: Inspecting and replacing worn weather stripping can help reduce wind noise and improve cabin comfort. Additionally, addressing any issues with window seals or aerodynamics can minimize wind noise levels.

    How Service My Car Assist You?

    Looking for the car service dubai? Look no further than Service My Car! Our expert technicians provide top-notch service, from routine maintenance to complex repairs, ensuring your vehicle runs smoothly. Why settle for mediocre service when you can experience the best with Service My Car? Schedule an appointment today and discover why we’re the preferred choice for car owners in Dubai. Drive with confidence knowing your vehicle is in good hands with Service My Car.

    In conclusion, while the Toyota Camry is known for its reliability and longevity, it is not immune to common problems that may arise over time. By staying informed about these issues and addressing them promptly, you can ensure that your Camry remains a dependable and enjoyable vehicle for years to come. Regular maintenance, timely repairs, and professional inspections are key to maximizing the lifespan and performance of your Toyota Camry.

  • A Comprehensive Guide to Suzuki Jimny's Common Problems

    The Suzuki Jimny is a beloved compact off-road vehicle known for its ruggedness and reliability. However, like any vehicle, it has its share of common problems. Whether you’re a current owner or considering buying one, understanding these issues can help you maintain your Jimny in top condition.

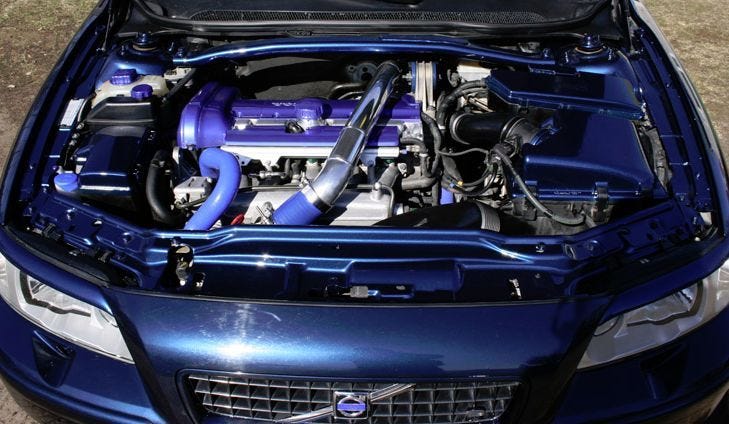
    Suzuki Jimny Engine Issues
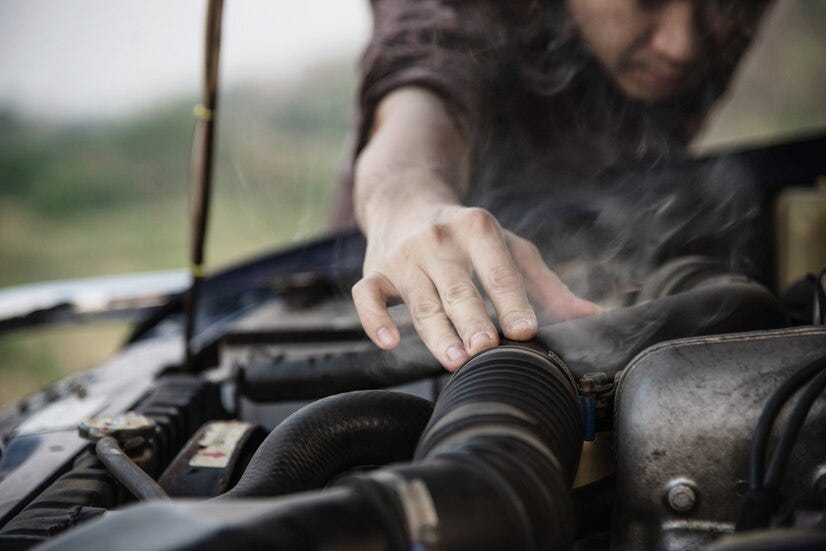

    Overheating

    One common problem with the Suzuki Jimny is engine overheating. This can be caused by various factors, such as a malfunctioning thermostat, a clogged radiator, or a faulty water pump. Symptoms include a high-temperature gauge reading, steam coming from the engine bay, and the smell of coolant. To prevent overheating, regularly check your coolant levels, ensure the radiator is clean, and replace the thermostat if necessary.

    Oil Leaks

    Oil leaks are another frequent issue. They often originate from the valve cover gasket, oil pan gasket, or crankshaft seals. Noticing oil spots under your vehicle or a burning oil smell can indicate a leak. Addressing oil leaks promptly is crucial to prevent engine damage. Regularly inspect the engine and replace any worn-out gaskets or seals to keep your Jimny running smoothly.

    Suzuki Jimny Transmission Troubles


    Manual Transmission Problems

    Manual transmission problems, such as gear slipping and clutch issues, are not uncommon. Gear slipping can be due to worn synchronizers or a failing clutch. Signs of clutch problems include difficulty shifting gears, a spongy clutch pedal, or a burning smell. Regular maintenance and timely replacement of the clutch and related components can help avoid these issues.

    Automatic Transmission Issues

    For Jimny models with automatic transmissions, delayed shifting and rough gear changes can be problematic. These issues are often linked to low or dirty transmission fluid. Regularly checking and replacing the transmission fluid, as well as inspecting the transmission for wear and tear, can help maintain smooth operation.

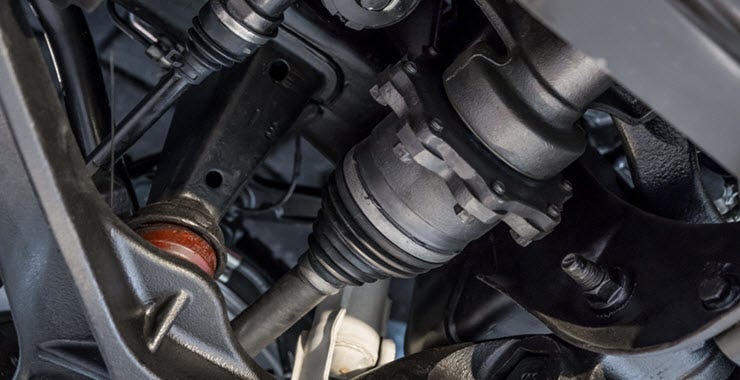
    Suzuki Jimny Suspension and Steering Problems


    Suspension Wear

    The Suzuki Jimny’s suspension system can wear out over time, especially if frequently driven off-road. Signs of suspension problems include uneven tire wear, a bumpy ride, and noise when going over bumps. Regularly inspecting the suspension components and replacing worn parts, such as shock absorbers and bushings, can enhance ride quality and safety.

    Steering Difficulties

    Steering issues, such as a loose or stiff steering wheel, can arise due to problems with the power steering system or worn steering components. Checking the power steering fluid levels and inspecting the steering linkage can help identify and resolve these issues.

    Suzuki Jimny Electrical System Faults
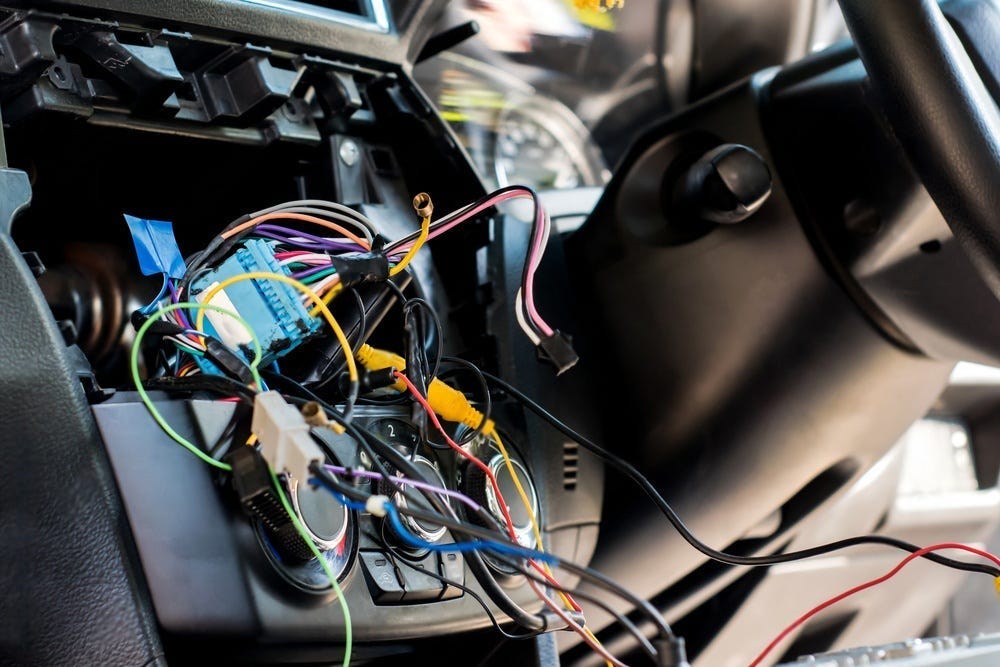

    Battery Issues

    Battery problems, like frequent drainage or failure to hold a charge, are common. This can result from leaving lights on, a faulty alternator, or an old battery. Regularly testing the battery and charging system, and replacing the battery every few years, can prevent unexpected breakdowns.

    Alternator Problems

    A failing alternator can cause electrical issues, such as dimming lights or a dead battery. Symptoms include warning lights on the dashboard and unusual noises from the alternator area. If the alternator is failing, it should be repaired or replaced to ensure the electrical system functions correctly.

    Suzuki Jimny Brake System Concerns


    Brake Pad Wear

    Worn brake pads are a safety concern that can lead to reduced braking performance. Indicators of worn brake pads include squeaking noises, a longer braking distance, and a pulsating brake pedal. Regularly inspecting and replacing brake pads is essential for maintaining safe braking performance.

    Brake Fluid Leaks

    Brake fluid leaks can compromise the braking system, leading to a spongy brake pedal or reduced braking power. Leaks often occur at the brake lines or calipers. Detecting and fixing brake fluid leaks promptly is vital to ensure your brakes function effectively.

    Suzuki Jimny Body and Interior Issues


    Rust and Corrosion

    Rust is a common problem, especially in older Jimny models. Common rust areas include the wheel arches, door sills, and undercarriage. To prevent rust, regularly wash your Jimny, especially after driving on salted roads, and apply rust protection treatments. If rust appears, treating it promptly can prevent it from spreading.

    Interior Wear and Tear

    The Jimny’s interior can suffer from wear and tear, such as fading upholstery and cracked dashboard materials. Using seat covers, regular cleaning, and using UV protectants on plastic surfaces can help maintain the interior’s condition.

    Suzuki Jimny Exhaust System Problems


    Exhaust Leaks

    Exhaust leaks can lead to increased noise, reduced engine performance, and harmful emissions entering the cabin. Common sources of leaks include the exhaust manifold, gaskets, and pipes. Inspecting and repairing the exhaust system can help maintain performance and reduce emissions.

    Emissions Issues

    Emissions issues, such as failing an emissions test, can be caused by problems with the catalytic converter, oxygen sensors, or exhaust leaks. Regular maintenance and timely replacement of these components can help ensure your Jimny meets emission standards.

    Suzuki Jimny Cooling System Failures


    Radiator Problems

    A failing radiator can cause engine overheating and coolant leaks. Symptoms include coolant under the vehicle, a high-temperature gauge, and coolant smell. Regular radiator maintenance, including flushing and replacing the coolant, can prevent these issues.

    Coolant Leaks

    Coolant leaks can occur from the radiator, hoses, or water pump. Signs of a coolant leak include a low coolant level, visible coolant under the car, and engine overheating. Identifying and fixing leaks early can prevent engine damage.

    Suzuki Jimny Fuel System Troubles


    Fuel Pump Failures

    A failing fuel pump can cause engine stalling, difficulty starting, and reduced performance. Symptoms include sputtering at high speeds and a whining noise from the fuel tank. Replacing a faulty fuel pump can restore proper fuel delivery to the engine.

    Fuel Injector Issues

    Fuel injector problems, such as clogs or leaks, can lead to poor engine performance and increased fuel consumption. Regularly cleaning the injectors and replacing them if necessary can ensure efficient fuel delivery.

    How Service My Car Assist You?

    Wondering where to find a reliable car battery replacement in Dubai? Look no further! Service My Car has you covered! Our professional technicians deliver top-notch battery replacement services right at your doorstep. Don’t let a dead battery ruin your day — trust Service My Car for quick and reliable solutions. With our convenient mobile service, we’ll have your car up and running in no time. Say goodbye to the hassle of finding a garage — book your battery replacement with Service My Car today!

    Conclusion

    The Suzuki Jimny, while a reliable and rugged vehicle, has its share of common problems. Understanding these issues and performing regular maintenance can help keep your Jimny in excellent condition. By addressing problems early and maintaining your vehicle, you can enjoy many years of trouble-free driving.

  • Unveiling the Top 5 Common Problems with the Volvo S60

    Introduction

    In the realm of luxury automobiles, the Volvo S60 stands out as a pinnacle of Scandinavian engineering and design. However, even the most meticulously crafted machines can encounter issues over time. In this comprehensive guide, we delve into the top 5 common problems that Volvo S60 owners may face, providing insights and solutions to ensure a seamless driving experience.

    1. Volvo S60 Electrical System Glitches


    Electrical system glitches often plague modern vehicles, and the Volvo S60 is no exception. Owners may encounter issues such as malfunctioning infotainment systems, erratic dashboard displays, or faulty sensors. These problems can stem from various sources, including wiring issues, software bugs, or component failures.

    To address electrical gremlins, it’s crucial to conduct thorough diagnostics using specialized equipment. Certified technicians can pinpoint the root cause of the issue and implement targeted repairs or software updates to restore functionality. Regular maintenance checks and software updates can also help prevent future electrical woes.

    2. Volvo S60 Transmission Concerns


    The transmission is a vital component of any vehicle, responsible for transferring power from the engine to the wheels. In some Volvo S60 models, owners may experience transmission-related issues such as rough shifting, delayed engagement, or transmission fluid leaks.

    Proper maintenance is key to ensuring the longevity of the transmission. Regular fluid checks and replacements, along with adherence to recommended service intervals, can mitigate the risk of transmission problems. Additionally, addressing any warning signs promptly can prevent minor issues from escalating into costly repairs.

    3. Volvo S60 Suspension Challenges


    A smooth and stable ride is synonymous with the Volvo S60 experience. However, suspension challenges can disrupt this harmony, leading to issues such as excessive bouncing, uneven tire wear, or a noticeable decline in ride quality.

    Suspension components undergo constant wear and tear, especially on vehicles traversing uneven terrain or experiencing harsh driving conditions. Routine inspections by qualified mechanics can detect worn-out bushings, damaged shocks, or misaligned suspension geometry. Timely replacements and alignments can restore the S60’s handling prowess and ride comfort.

    4. Volvo S60 Engine Performance Issues


    The heart of any vehicle, the engine, powers the Volvo S60 with robust performance and efficiency. Nevertheless, owners may encounter engine-related issues such as rough idling, decreased power output, or illuminated warning lights indicating potential faults.

    Regular maintenance, including oil changes, filter replacements, and spark plug inspections, is crucial to preserving engine health. Additionally, addressing any abnormal symptoms promptly can prevent minor issues from escalating into major repairs. Advanced diagnostic tools enable technicians to diagnose engine problems accurately and implement effective solutions.

    5. Volvo S60 Brake System Malfunctions


    The brake system is paramount to vehicle safety, providing reliable stopping power in various driving conditions. However, Volvo S60 owners may encounter brake-related issues such as squealing brakes, pulsating pedal feedback, or decreased stopping performance.

    Routine brake inspections are essential to detect worn brake pads, warped rotors, or fluid leaks. Timely replacements and maintenance of brake components ensure optimal braking performance and enhance overall safety on the road.

    How Service My Car Assist You?

    Looking for top-notch car windshield repair dubai? Service My Car has you covered! Whether it’s a minor crack or a major chip, our expert technicians ensure a seamless repair process, restoring your windshield’s integrity and clarity. Say goodbye to obstructed views and safety concerns on the road. Trust Service My Car for efficient and reliable windshield repairs that keep you driving safely in Dubai’s bustling streets. Don’t let a damaged windshield slow you down - get it fixed with us today!

    Conclusion

    While the Volvo S60 epitomizes luxury, performance, and safety, it’s not immune to common automotive woes. By addressing the top 5 common problems outlined in this guide with proactive maintenance and timely repairs, owners can uphold the integrity and reliability of their beloved vehicles for years to come.